I little over a year ago, I made my very first plumbing-related blog post: a report on how I learned I should flush my water heater to eliminate rust-colored water, and should replace its anode when it’s fully eroded. Since that first post, I’ve enjoyed progressively attempting more complex DIY plumbing projects, and have shared most of them with you here on my blog. And bolstered by the success of those projects, I decided last week it was time to take on what I consider to be my first “major” DIY plumbing project: replacing a water heater!
How to Know When to Replace Your Water Heater
On average, a quality water heater should last between 12-15 years. As a general guide for how long yours will probably last, check the warranty on your unit. As with most warrantied items, they’re designed to wear right after the warranty period ends. Although, if you have extremely hard water in your area, the lifespan of your water heater could be significantly shorter. Or, if you have average water and/or maintain your water heater by flushing it annually and replacing the anode when needed, you could potentially double or triple its expected lifespan.
Most homeowners, however, don’t maintain their water heaters at all. Hey, I’m not judging — I didn’t do anything with either of the water heaters in our main house until that very first plumbing post over a year ago… after both water heaters had been in service for over 15 years! And even though I finally “saw the light” and eventually started maintaining them, I still couldn’t fight the feeling that I was living on borrowed time (and it turns out, I really was).
There are a few obvious signs that it’s time to replace your water heater. The most obvious, of course, is if it starts leaking from the sides or from the bottom. If it’s leaking from a hose or fixture, those can just be tightened or replaced. But if the tank has rusted through its wall or bottom and is leaking, you’re in trouble… and you’ve waited until the most expensive time to replace your water heater. Why the most expensive? Two reasons. First, if the leak causes water damage in your house, repairs house can get real expensive, real quick. Second, a major water heater leak will force you to shut off your water heater — meaning nobody in the house will be able to shower, do laundry, wash the dishes, or otherwise use hot water until you get a new one. And when you call up that plumber (in Beverly Hills… you know the one… “Mr. Everything Will Be Expensive)” and tell him to hurry over because you don’t have any hot water, all he’ll be able to hear is “ka-CHING, ka-CHING!” He’ll buy the replacement from a plumbing supply warehouse for $400, tell you it costs $700, and charge you $500 more to install it. And you’ll be far less prone to price shop, or even take a few days to research your options, when replacing your water heater is an urgent priority… and you’ll end up paying way more than you really should.
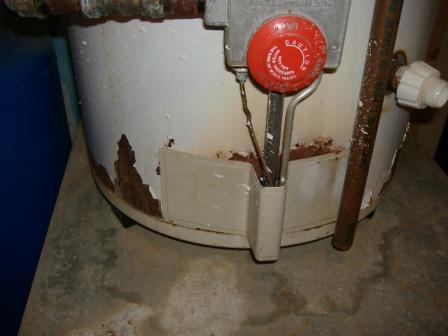
But what if your water heater isn’t leaking, but has visible rust or corrosion on the top, sides, and/or bottom? That’s still a sure sign it’s time to replace it.
![Rusty water heater]()
Rusty water heater is no bueno.
Bite the bullet and spend the money to replace it now, before you end up spending money on replacement plus home repairs.
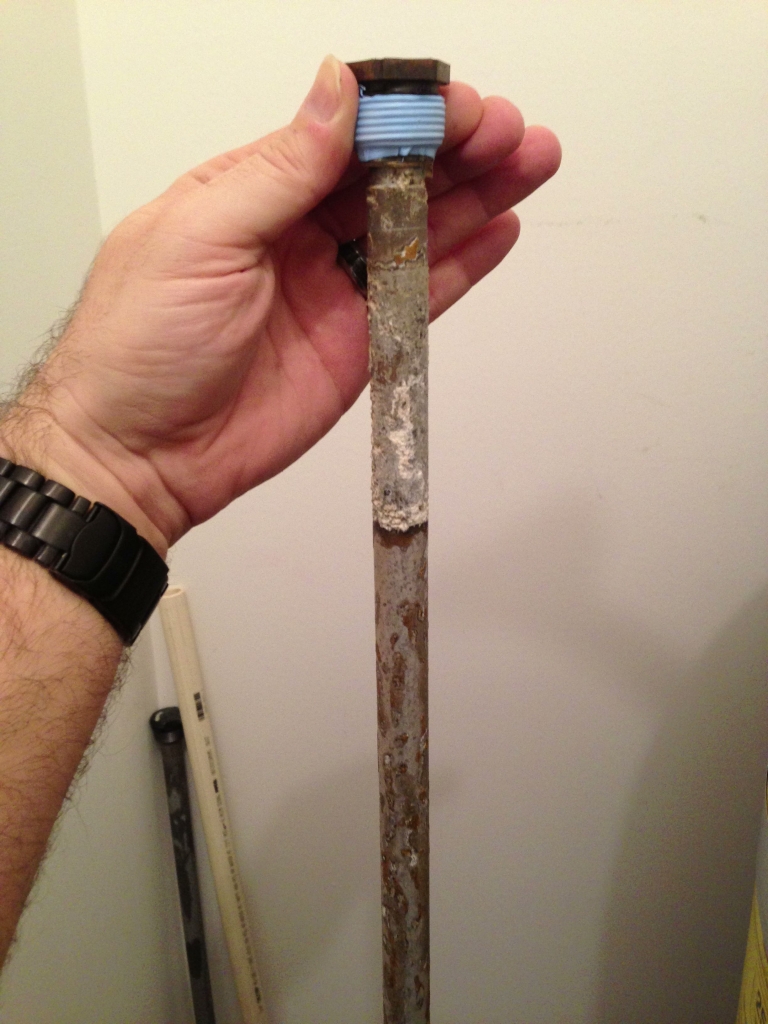
In my case, my two water heaters weren’t showing any signs of rust, but they had both been installed in 1997. Back then, this neighborhood shared a community well, and the water was extremely hard. And even though we’ve now got city water (and fire hydrants — yay!), those water heaters are now 17 years old, spent most of their life with hard water, and were neglected by me for all but the last year. So even with no exterior signs of trouble, I had a feeling that my aging water heaters probably looked like this on the inside:
![Scale and rust buildup inside your water heater.]()
Scale and rust buildup inside your water heater.
Build-up like that not only turns your water brown, but it forms an insulating barrier on the bottom of your tank… which requires more burning of natural gas to heat your tank. So by proactively replacing my water heaters now, I’ll save money every month by using less energy to heat our water.
Choosing a Replacement Water Heater
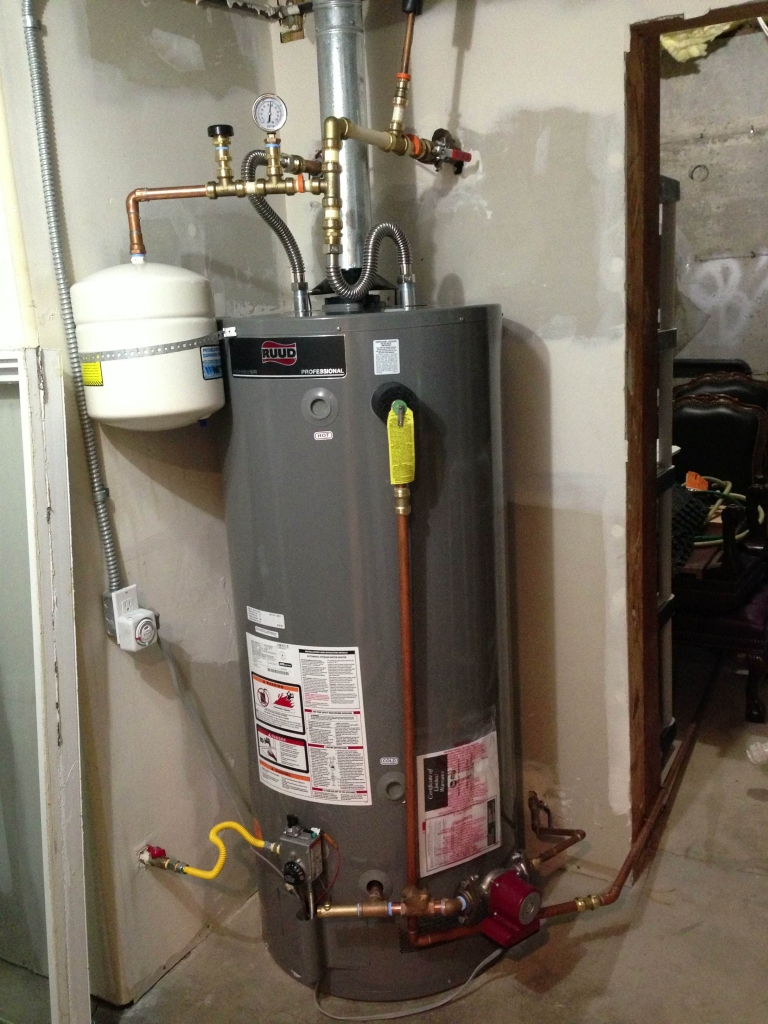
There are plenty of options for water heaters, but the two leading US brands sold by professional plumbers are Bradford White and Rheem/Ruud (Rheem/Ruud also make Richmond and GE water heaters). I’ve got two Bradford White electric units out at our cabin, and two Bradford White gas units at our Utah house. I like the Bradford Whites — they have a solid reputation as quality water heaters. But their anodes are integrated into their hot water tube (unlike the Rheem/Rude units that have standalone anodes), making it harder to extract the anode during my annual flush and inspection. Here at the main house, we’ve got two Rheem units: a 75 gallon tank that services some bedrooms, the laundry, and the kitchen, plus a 50 gallon tank that services a few other bedrooms. They’ve both been worry-free for 17 years, so I decided there’s no reason not to trust the same brand again. I located their model numbers, called Rheem’s customer support department, and asked for the current model numbers that correspond to my existing units. One major advantage of using a direct replacement is knowing I wouldn’t have to worry about modifying the existing overhead venting, and I also knew that the existing cold “in” and hot “out” water locations would work fine with the replacement units.
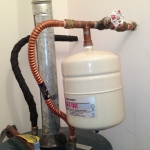
My existing 50 gallon tank is a 1997 Rheem 21V50-2, which is the same as a 2014 Rheem or Ruud PRO+G50-38N RU58. My 75 gallon tank is a 1997 Rheem 21VR75, which matches the current Rheem/Ruud PRO+G75-75N RU. I got the best price on the 50 gallon unit for $399 from a local hardware store (yay McLendon!) and picked up the 75 gallon monster at a commercial plumbing supply company (Keller Supply) for $899. I also picked up new expansion tanks for each of the new water heaters, because both of the old ones leaked water when I pressed their Schrader valves to test. Water from an expansion tank’s Schrader valve means its bladder has ruptured and it needs to be replaced (see this separate blog post on the importance of expansion tank testing and replacement).
Out With The Old…
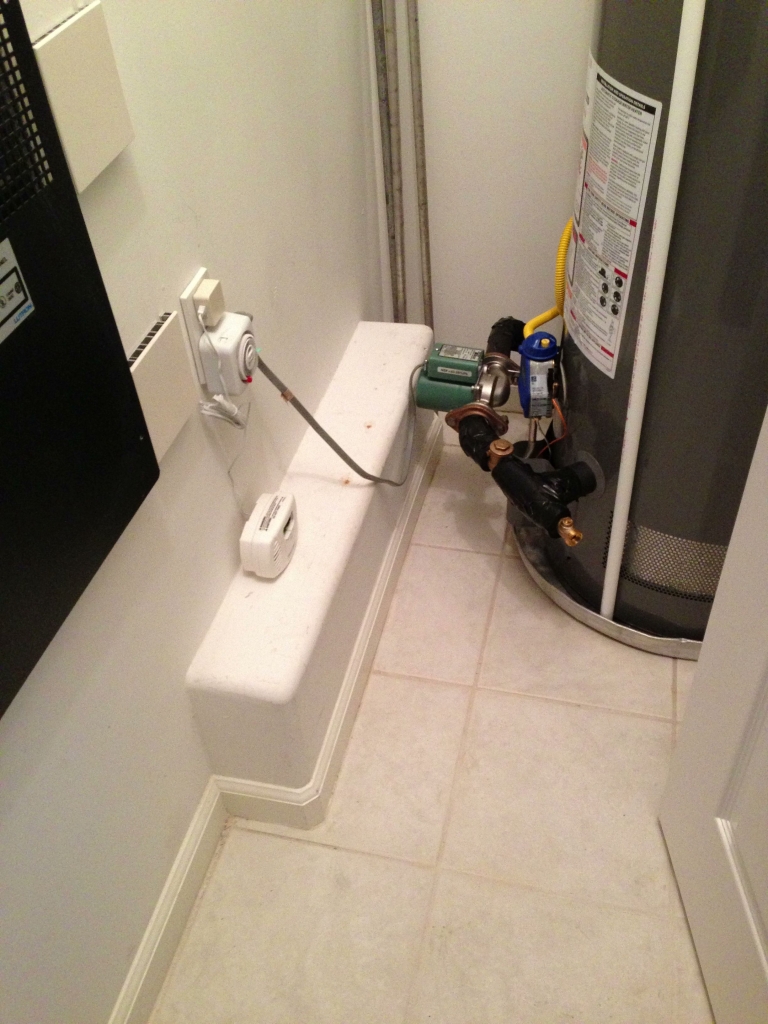
Of course, before one can install a new water heater, one must remove the old one! I decided to start with the 50 gallon unit first, so for the rest of this article, I’ll focus on that one. I probably would have been fine using all of the existing hoses, pipes, and fittings that were already in place with the old tank, but since I wanted to make a few upgrades (I’ll explain below), I decided to replace most of the surrounding plumbing at the same time.
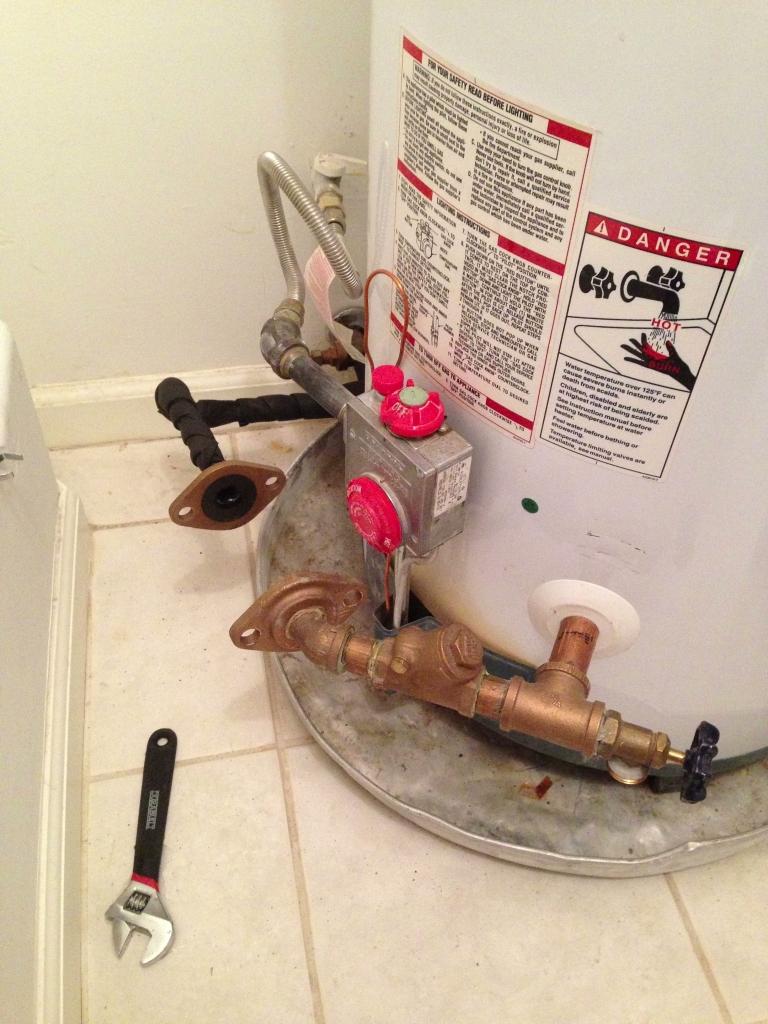
The day before doing the swap, I snapped some close-up photos of all the existing connections with my iPhone. Having them for reference makes it way easier than standing in a hardware store, scratching your head, trying to remember whether you needed a 3/4″ male NPT, or a 3/8″ compression fitting. Here are some of the shots I took of my old water heater and connections (click on any image to launch the gallery):
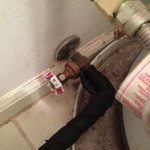
![Main shutoff valve, cold water inlet, and expansion tank]()
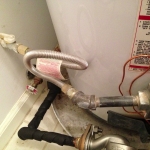
![Recirculating pump return line and shutoff]()
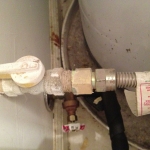
![Recirculating pump and drain fittings]()
![Natural gas connections]()
![Natural gas line fittings]()
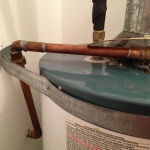
![TPR valve discharge line]()
Armed with my photos, I met my Dad at the McLendon hardware store near his house for some old-fashioned hardware store father/son bonding time (when I was a kid, we used to hit Parkrose Hardware pretty much every Saturday morning). At McLendons, we tracked down their plumbing section expert (he wasn’t hard to find… he was behind the desk in the plumbing section), showed him the photos, and he walked around with us for 30 minutes, answering questions and making suggestions, until we had all the necessary bits and a more than a few helpful tips.
When I know exactly what I’m looking for, I go to the “big box” hardware stores like Home Depot or Lowes. But… if I actually need help with a project, it’s totally worth paying an extra dollar or three for the service and expertise that comes only at a hardware store filled with people who’ve actually used the tools and parts they sell. Rock on, McLendons!
After returning home with my bag of plumbing bits, I waited until everyone had gone to bed, then shut off the main gas outlet in the utility closet that houses the water heater. This turned off the burner, allowing the water in the tank to cool overnight. I also shut off the cold water inlet and the recirculating pump.
The next morning, I drained the tank by opening a nearby hot water faucet to break suction:
![Open a hot water faucet any time you drain a water heater]()
Open a hot water faucet any time you drain a water heater
then connected my Simer M40P mini pump (seriously – that thing has come in way more handy that I ever imagined) and sucked all the water out of the tank and into a nearby drain:
![Using a pump really speeds things up!]()
Using a pump really speeds things up!
Once the tank was empty, I warned my wife that I needed to shut off the water main to the whole house for a few minutes. Normally, you wouldn’t need to do that when replacing a water heater — you’d just close the cold water shutoff valve on the cold water inlet to the tank. However, during this project, I wanted to replace the old “faucet-style” shut-off valves on both the cold water inlet and the recirculating pump return line with “lever-style” ball valves, which are less prone to leaks, can be shut off quickly with a 90 degree turn of the lever, and can be quickly glanced at to determine whether or not they are open.
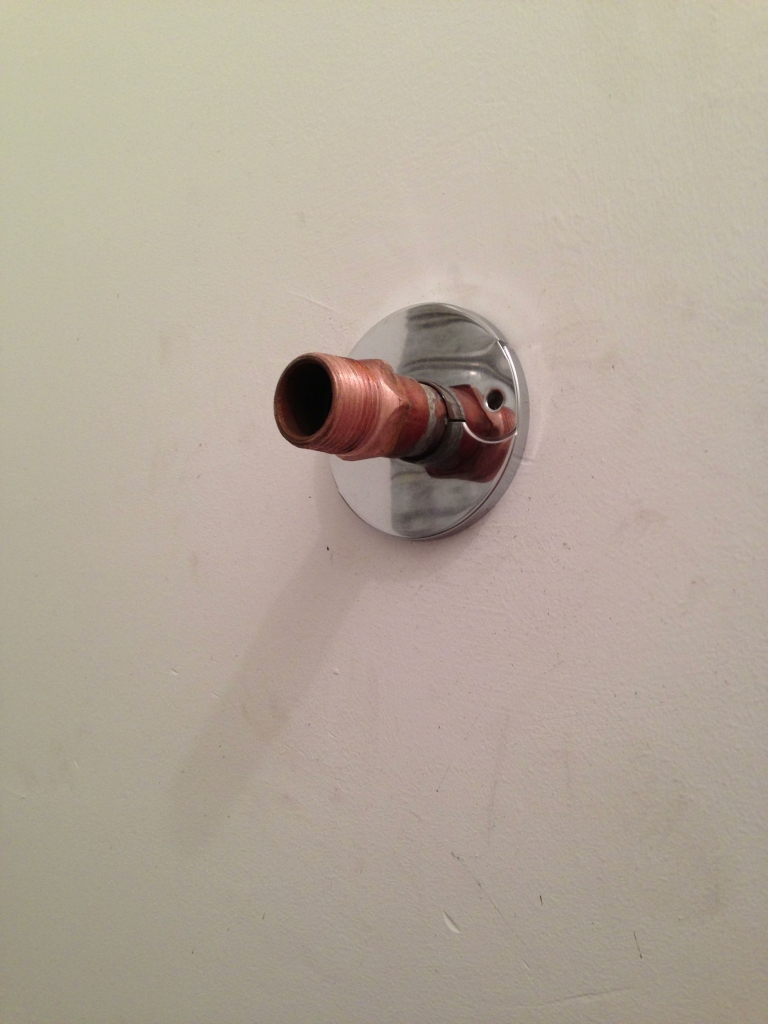
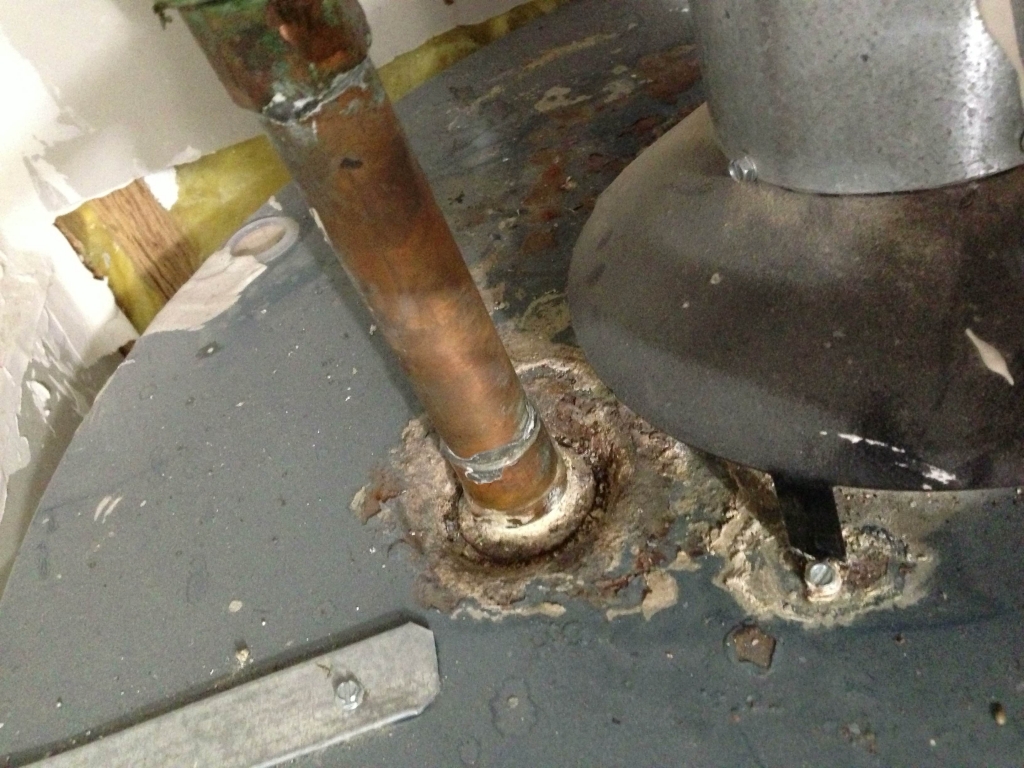
With the water to the whole house shut off, I used channel lock pliers and a Crescent wrench to disassemble and remove everything between the cold water inlet nipple on the tank and the threaded end of the cold water copper line sticking out of the wall:
![Cold water inlet sticking out of the wall]()
Cold water inlet sticking out of the wall
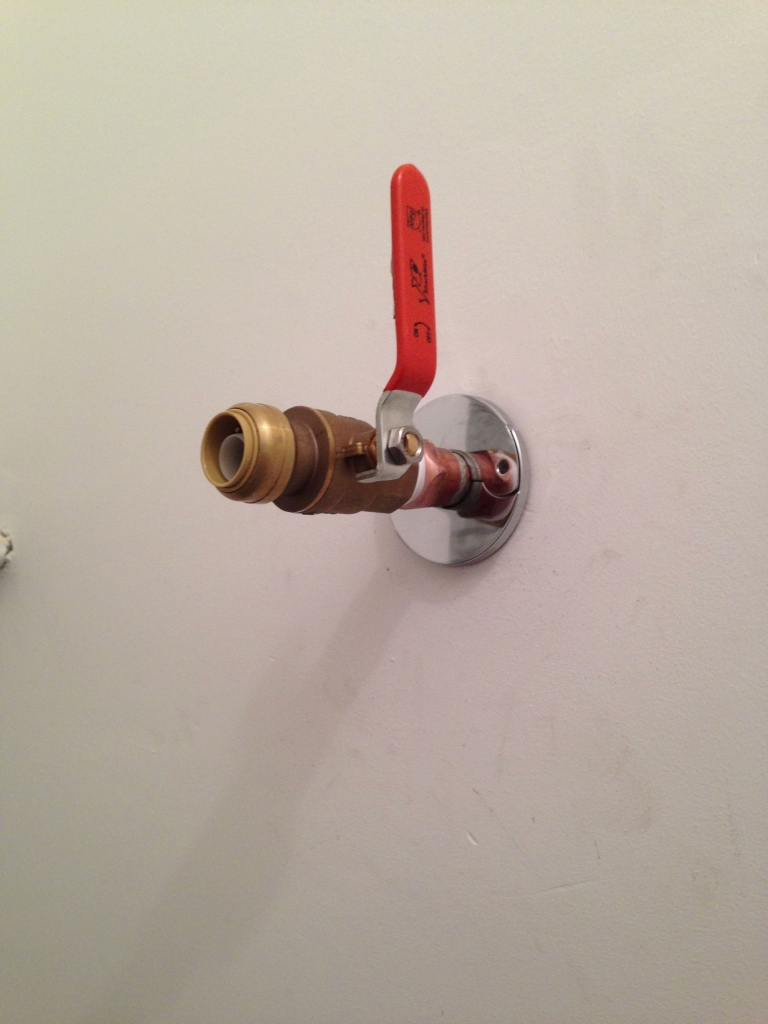
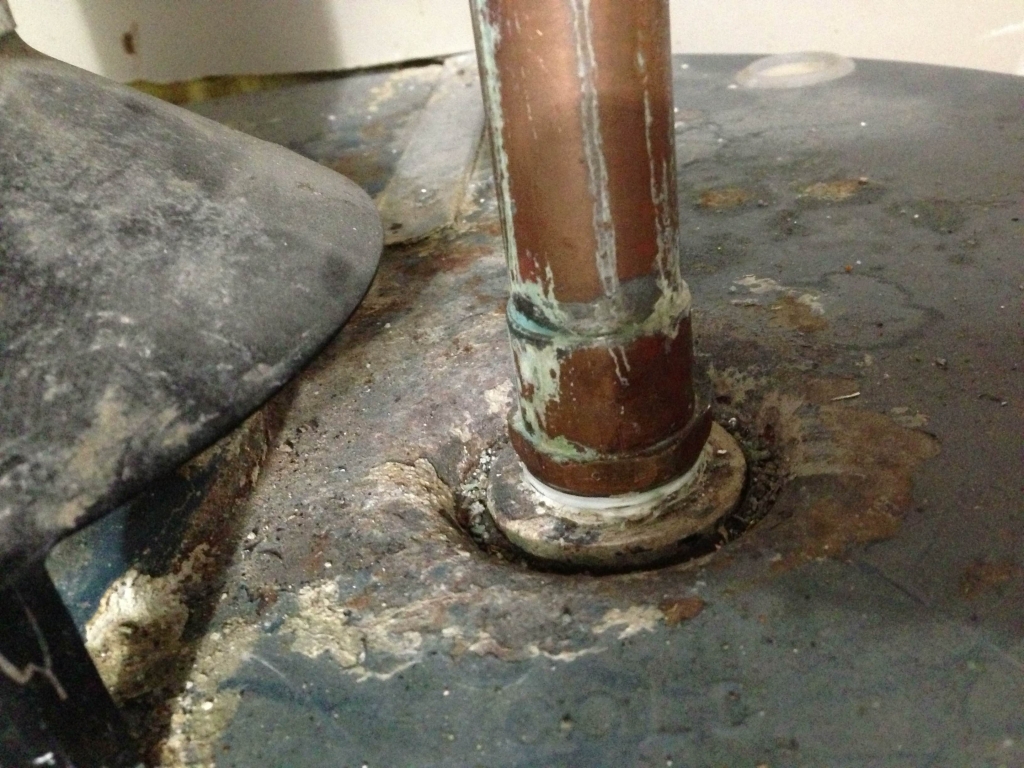
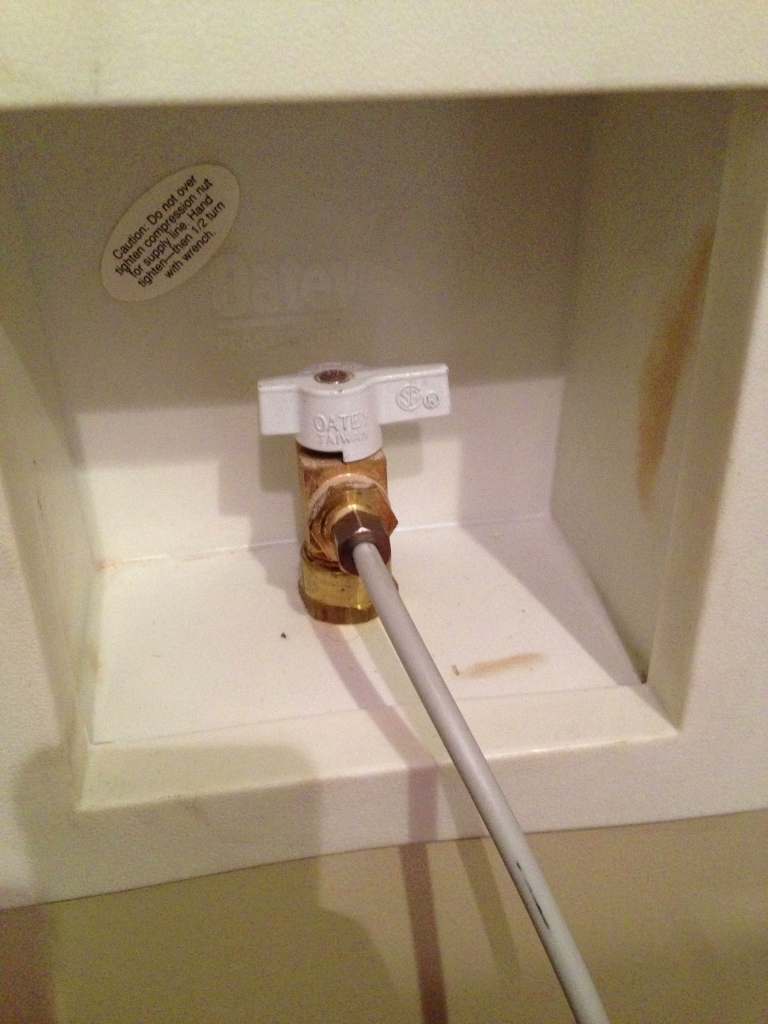
Now came the first opportunity to use an awesome new tool I’d recently picked up: a four-in-one copper pipe cleaning tool. I used it to quickly clean the threads on the 3/4″ cold water inlet pipe, wrapped the threads with Teflon tape, screwed on a 3/4″ Shark Bite ball valve, and tightened it down with a wrench.
![Shark Bite 3/4" ball valve installed]()
Shark Bite 3/4″ ball valve installed
With the new ball valve closed, I turned the main water back on to the house. Next, I removed the Taco 007-SF5 recirculating pump from its flanges (that’s the same pump I replaced in this YouTube video).
![Recirculating pump removed]()
Recirculating pump removed
Next, I used a pipe wrench to remove all the brass and bronze fittings from the drain outlet of the old tank.
![Bronze fittings removed from tank's drain]()
Bronze fittings removed from tank’s drain
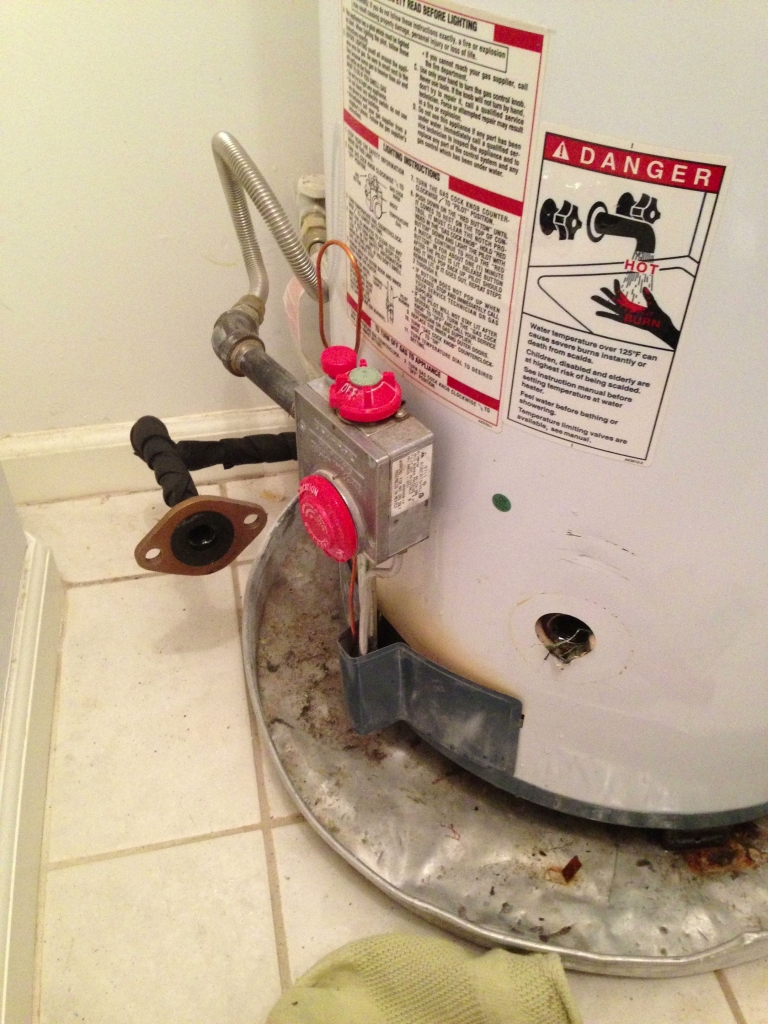
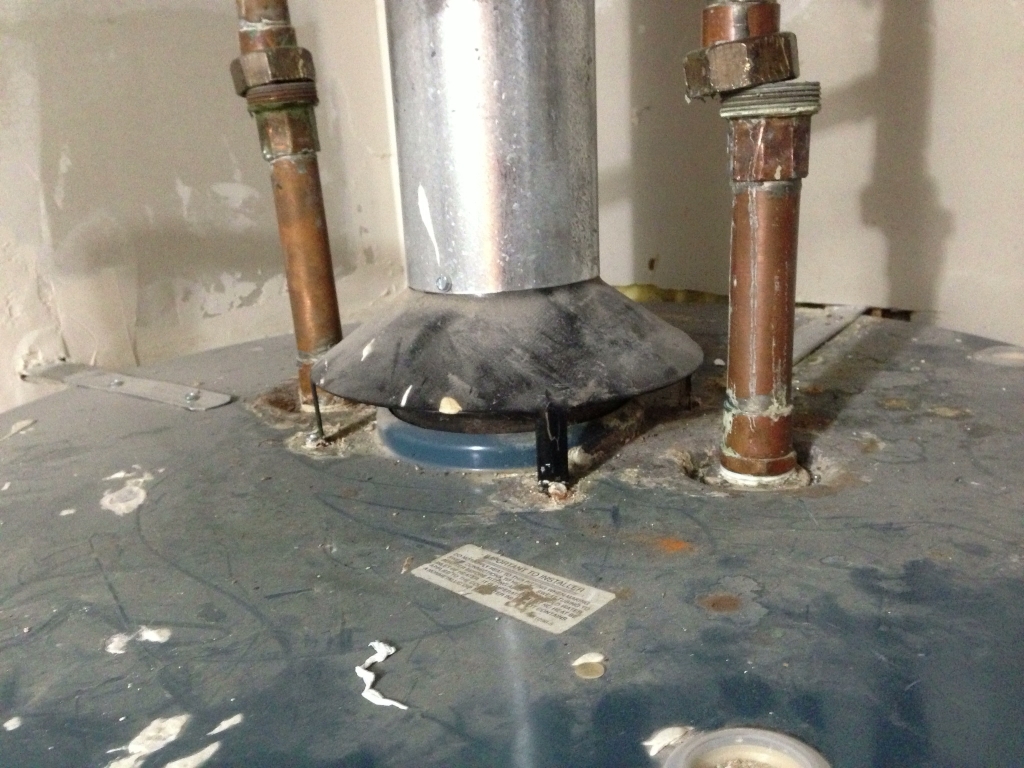
Finally, I was able to remove the hot water line that connected to the hot water stub in the wall, disconnect the TPR valve from its discharge tube, unscrew and lift off the overhead vent ducting, then unscrew the lame excuse for an earthquake strap from the wall. Not surprisingly, I discovered that the “professional” that had installed the strap used tiny screws and put them directly into the drywall… nowhere near a stud. It’s not exactly “earthquake proof” when a strong sneeze could have knocked that tank over.
![Final connections removed]()
Final connections removed
At about this time, my Dad showed up at the house to help me with the swap. An old-skool farm boy from Idaho, he’s who I get my “handy gene” from. When I was a kid (and he was the age I am now), I’d “help” him with his DIY projects around the house every Saturday… mostly by handing him tools, holding flashlights, reading instructions, and playing “go-fer.” Now that he’s retired, we’ve swapped roles. I placed a comfy chair in the hallway in front of the water heater’s utility closet, and he settled in to watch me help. ![:)]()
With everything disconnected it was time to remove the old tank. It’s considerably lighter when it’s empty, but still heavy enough to require a hand truck. I muscled it out of the metal floor pan and onto the hand truck, then wheeled it outside to the driveway. Just as I was wheeling it down the outside steps, some rust-colored water that remained in the tank started pouring from the bottom side seam. I’d dodged a bullet — the tank was in the early stages of failure, and could have let go at any minute! I’d been right about living on borrowed time!
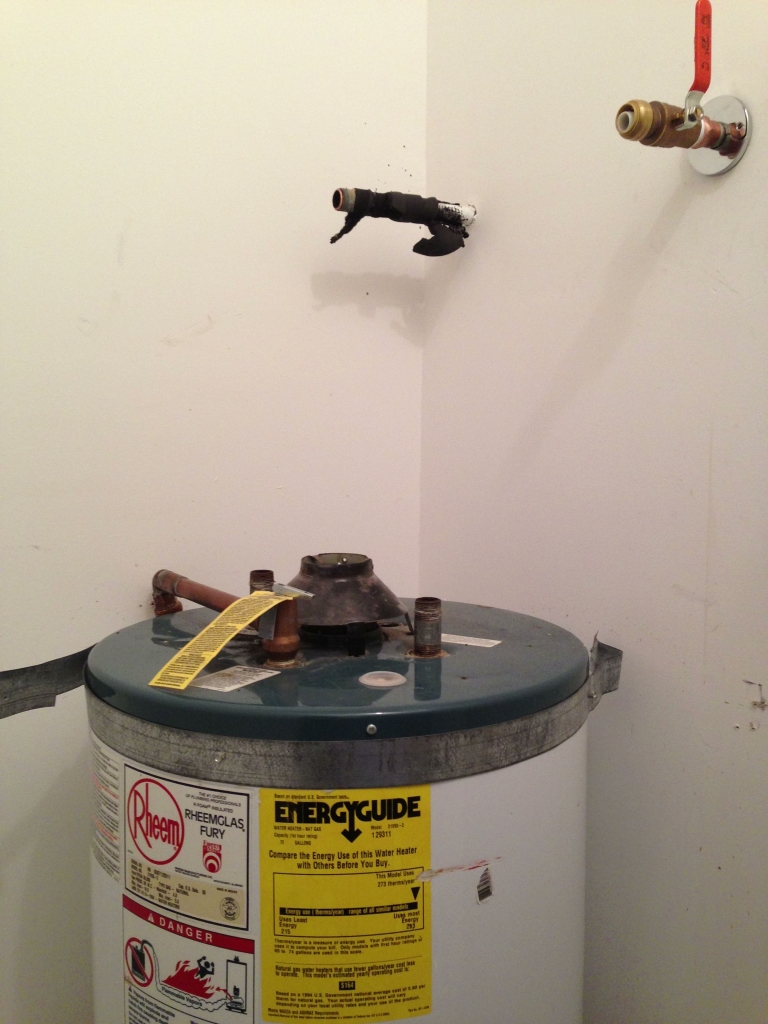
With the old tank gone, the utility closet seemed a whole lot roomier!
![An (almost) blank canvas to work with!]()
An (almost) blank canvas to work with!
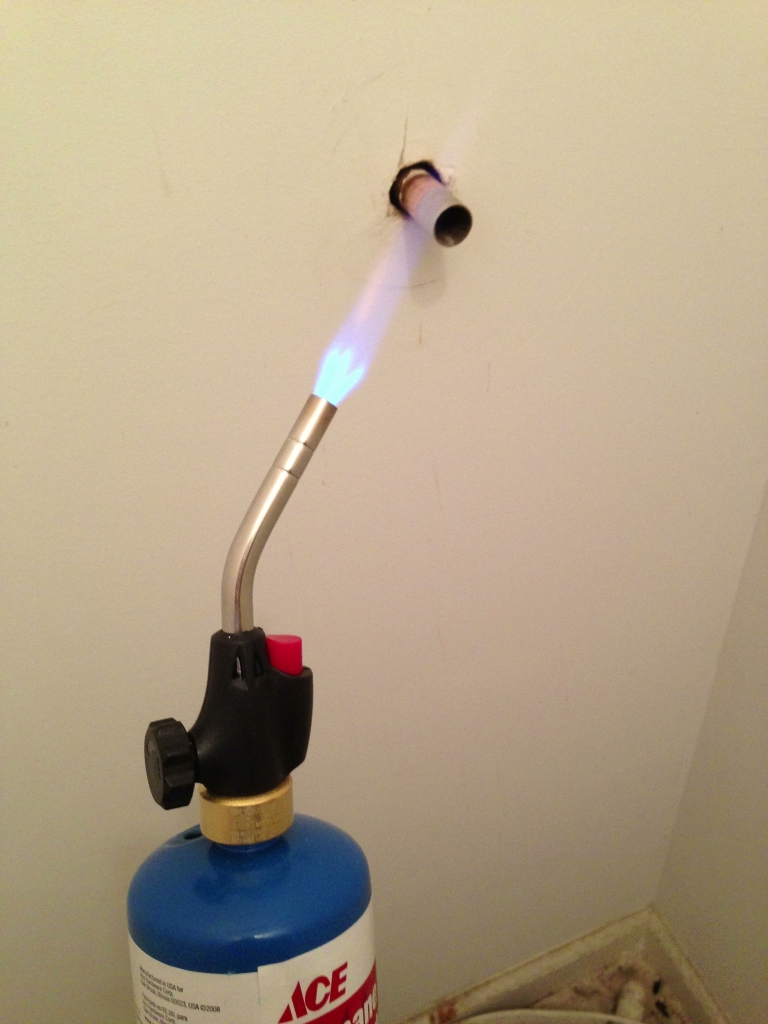
But I wasn’t ready to bring in the new tank just yet. The old tank’s TPR valve had been mounted on top and discharged horizontally into a copper drain pipe in the wall, but new tank’s TPR valve was mounted on the side and discharged downward. So for the first time in my life, I got to use a propane torch to remove the plumbing sweat joint on the old copper drain pipe!
![No sweat! Literally. I removed the sweat joint.]()
No sweat! Literally. I removed the sweat joint.
I did the same thing to the old-style recirculating shut-off valve near the floor. Note the awesome char marks I made on the wall! ![:)]()
![Old faucet-style recirculating line shut-off valved removed]()
Old faucet-style recirculating line shut-off valved removed
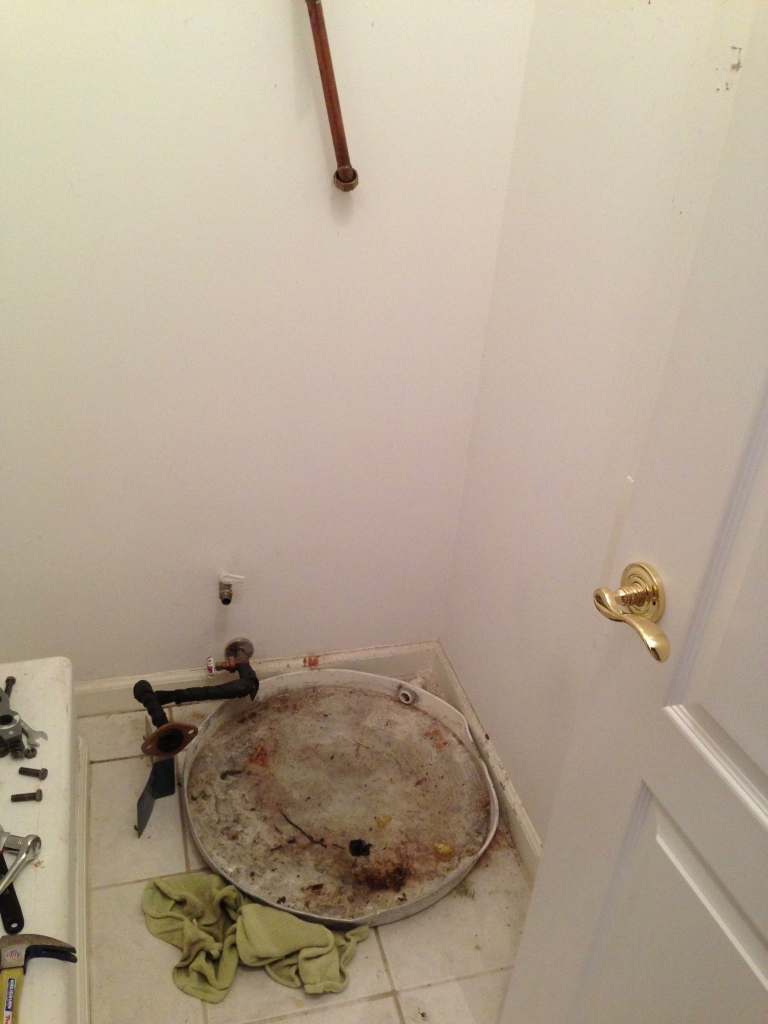
I used my four-in-one pipe cleaning tool once again to clean both exposed copper pipes, then used a Shark Bite cap to plug the old TPR valve discharge drain, and did my best to clean out all the crud in and around the metal floor pan (which, I discovered, had a drain into the floor in the far corner – cool!). Now I was ready to bring in the replacement water heater!
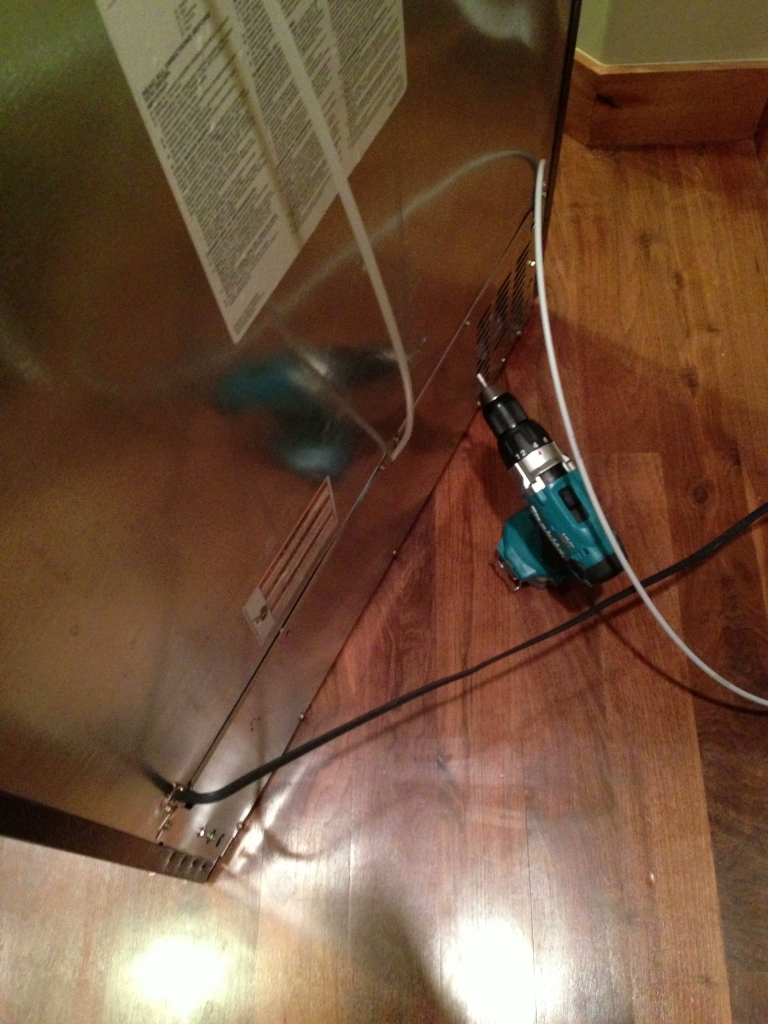
In With The New!
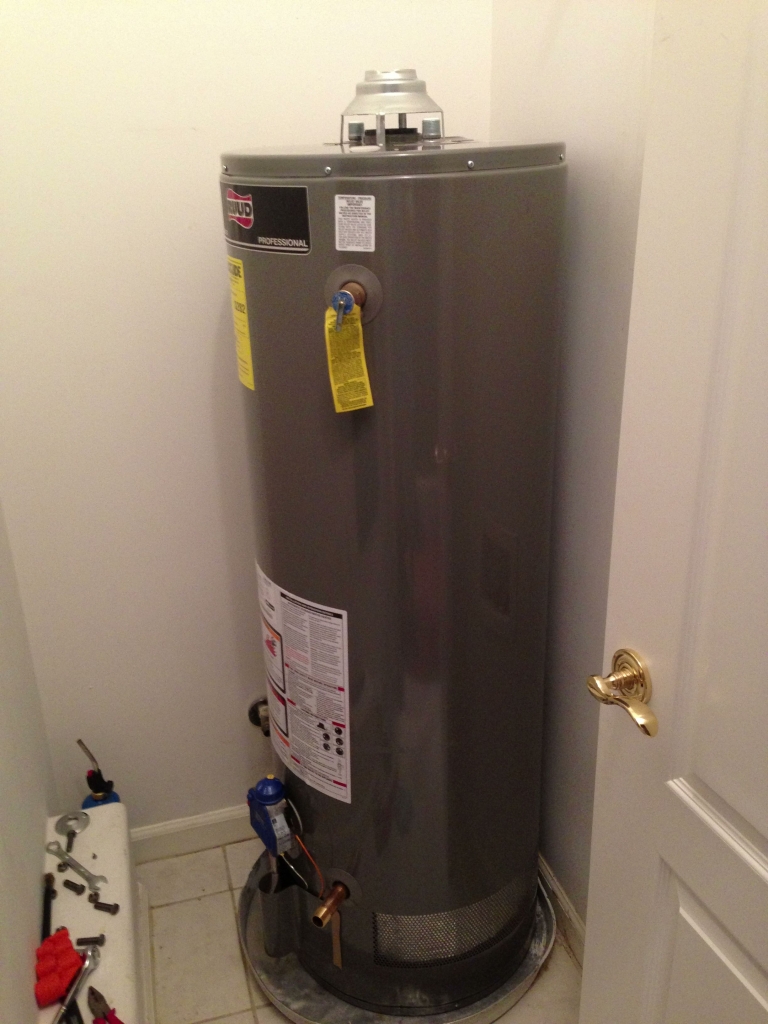
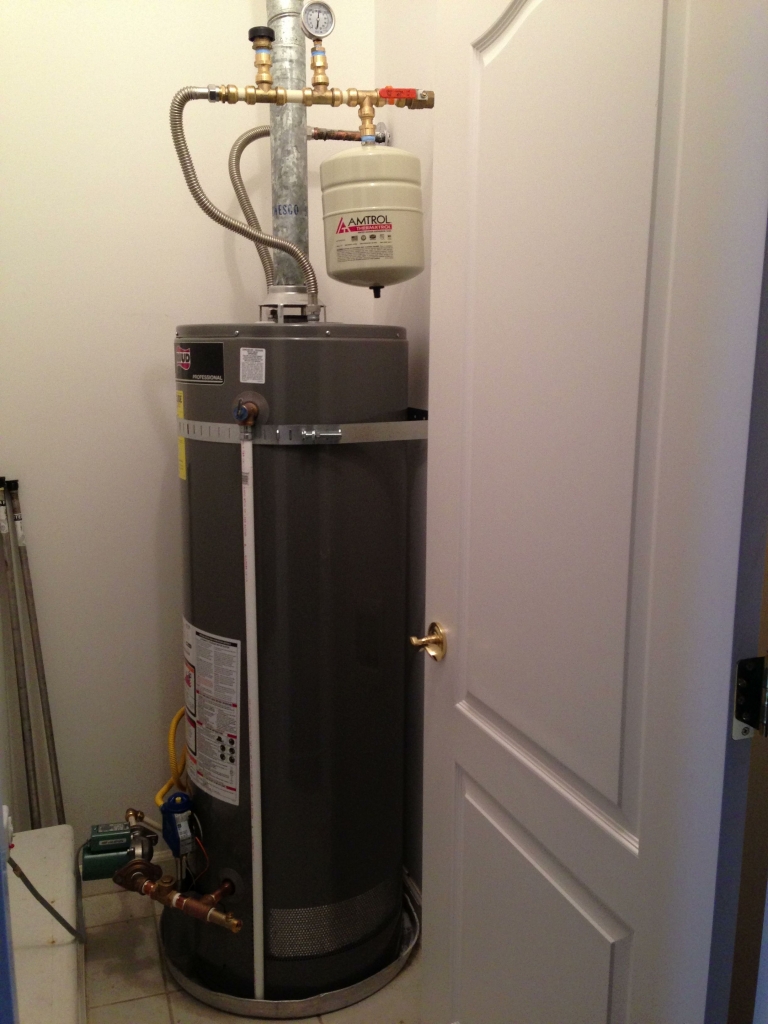
Using the hand truck once again, I brought the box containing the new water heater into the house, cut it open, and wheeled the new tank into place.
![Looks exactly like the old one... but awesomer!]()
Looks exactly like the old one… but awesomer!
With the new tank in place, the first thing I did was use a pipe wrench to unscrew and remove the existing drain from the front of the water heater, then screw in a new 4″ red brass nipple with male threads on both ends (look near the bottom of the above photo).
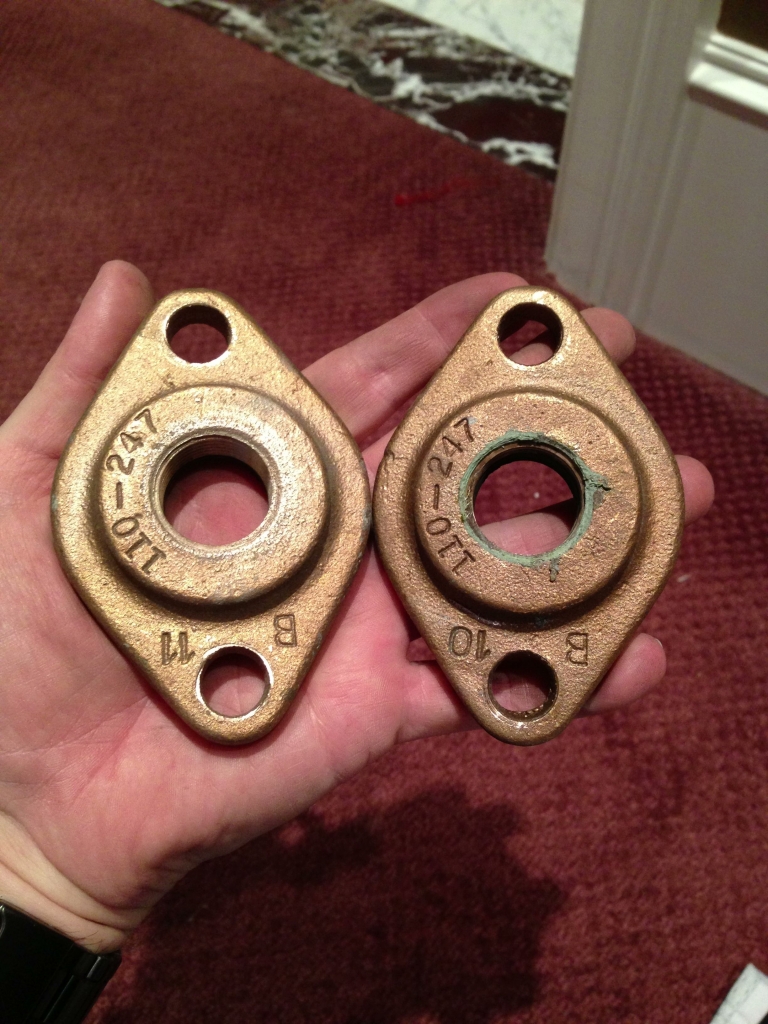
Because most of the old fittings and flanges from the recirculating pump return line were bronze, I was able to clean them (using my new brush tool) and re-use them with the new water heater. Here’s a “before & after” shot of the two bronze Taco recirculating pump flanges:
![All the bronze hardware cleaned up nicely!]()
All the bronze hardware cleaned up nicely!
I spent a good chunk of time disassembling, brushing, cleaning, and re-applying fresh Teflon tape to all the threads of the brass and bronze recirculating pump and drain line components, but it was totally worth it. I put them all aside for re-assembly later.
Next, I re-installed the vent ducting on the top of the water heater, and used my original sheet metal screws from the old water heater to attach it. Because the new tank was the same height as the old one, the ducting didn’t need any modification; it just popped right back into place!
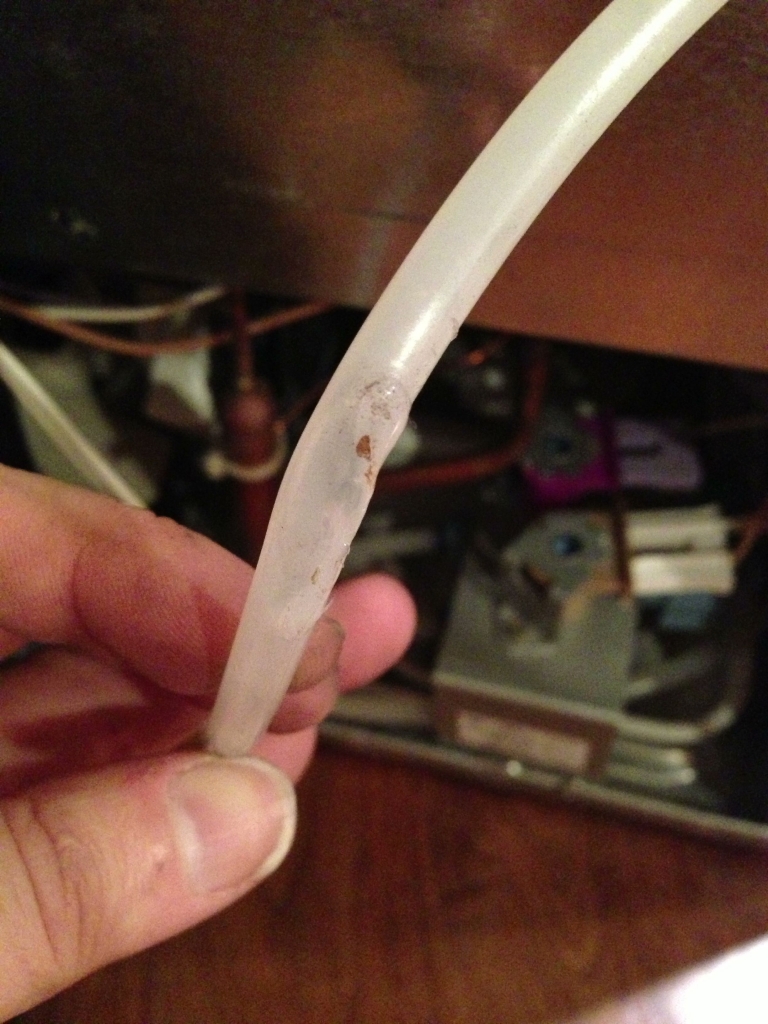
In order to make connecting everything on the new water heater as easy as possible, I decided to use CVPC pipes and Shark Bite fittings everywhere. CPVC is a special type of PVC pipe that’s rated for use anywhere you’d use copper, but it’s 1/3 the price of copper, easier to cut, and easier to connect (you can glue CPVC vs. sweat soldering copper).
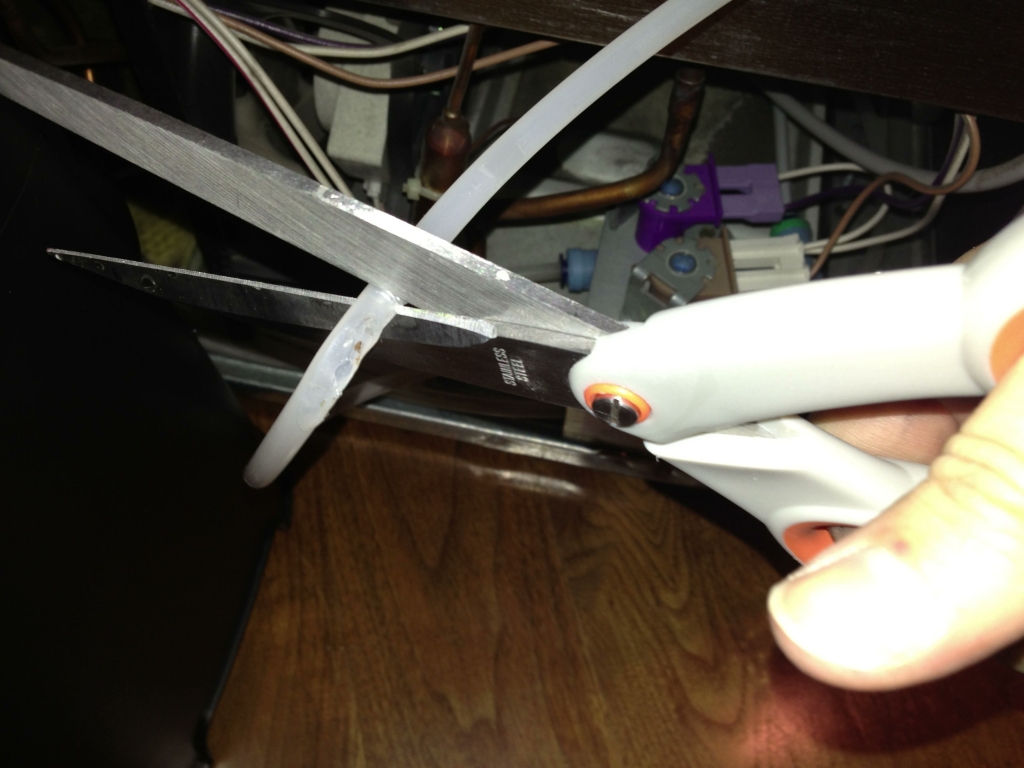
Shark Bite fittings are “push-on” fittings that make plumbing almost as easy as playing with Legos. And the best part is that you can remove them with a small orange plastic horseshoe-shaped tool and re-use them any time. It really is ridiculously easy to use, and is perfect for rookie DIY plumbers like me:
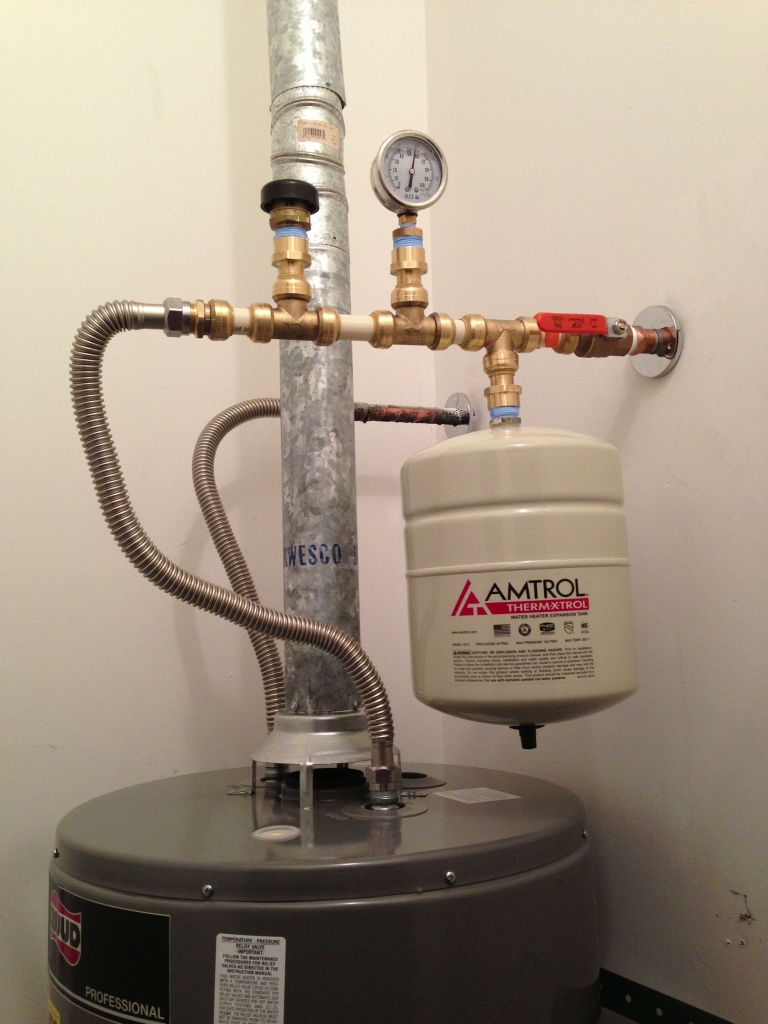
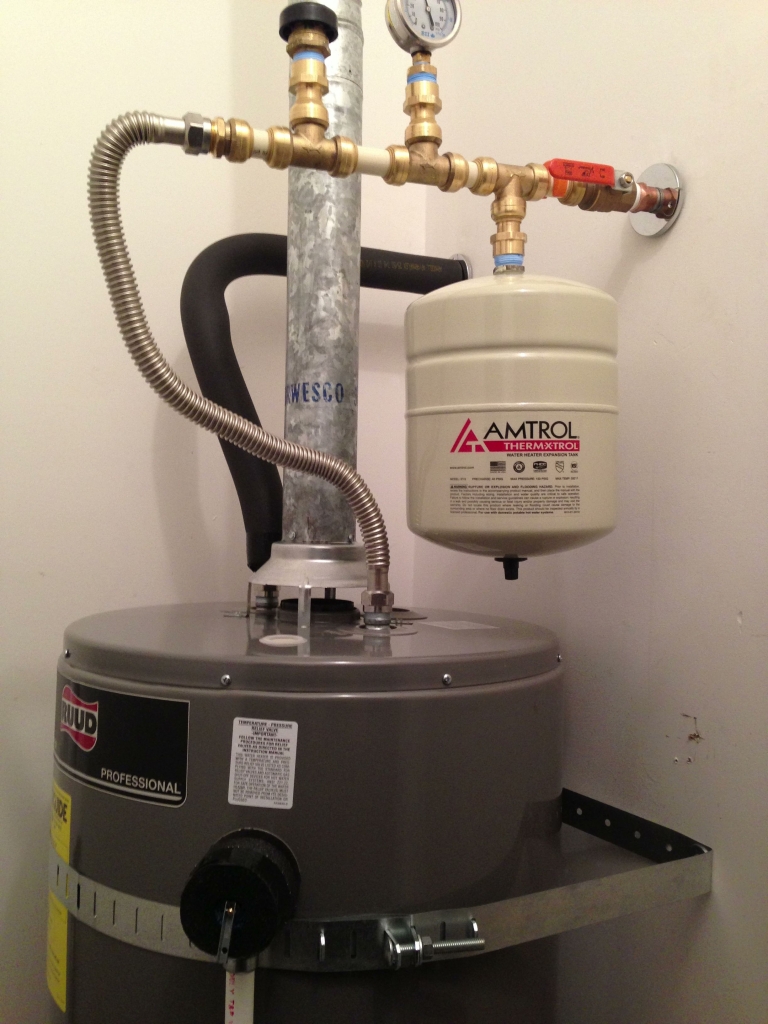
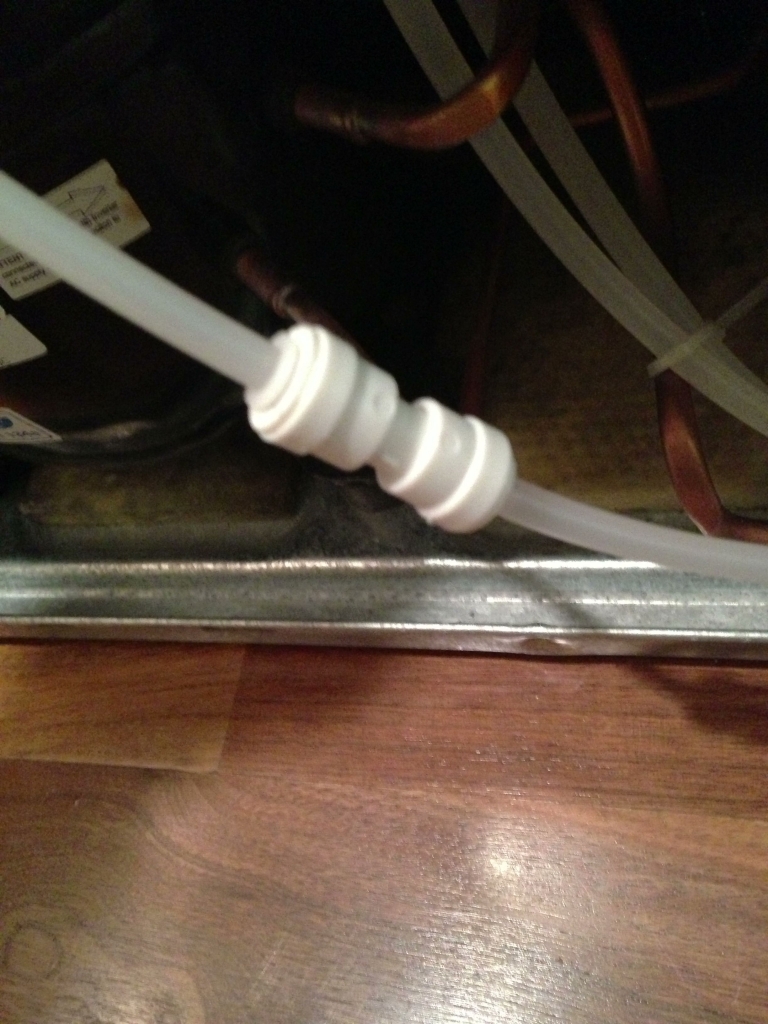
Armed with my Shark Bite fittings and CPVC, I decided I’d connect everything up in the direction of water flow from the shut-off valve. The first thing I wanted to install was my new Amtrol ST-5 expansion tank. The factory-set precharge on this expansion tank is 40 PSI, but you’re supposed to modify your tank’s pre-charge to the actual pressure of the water coming into the water heater.
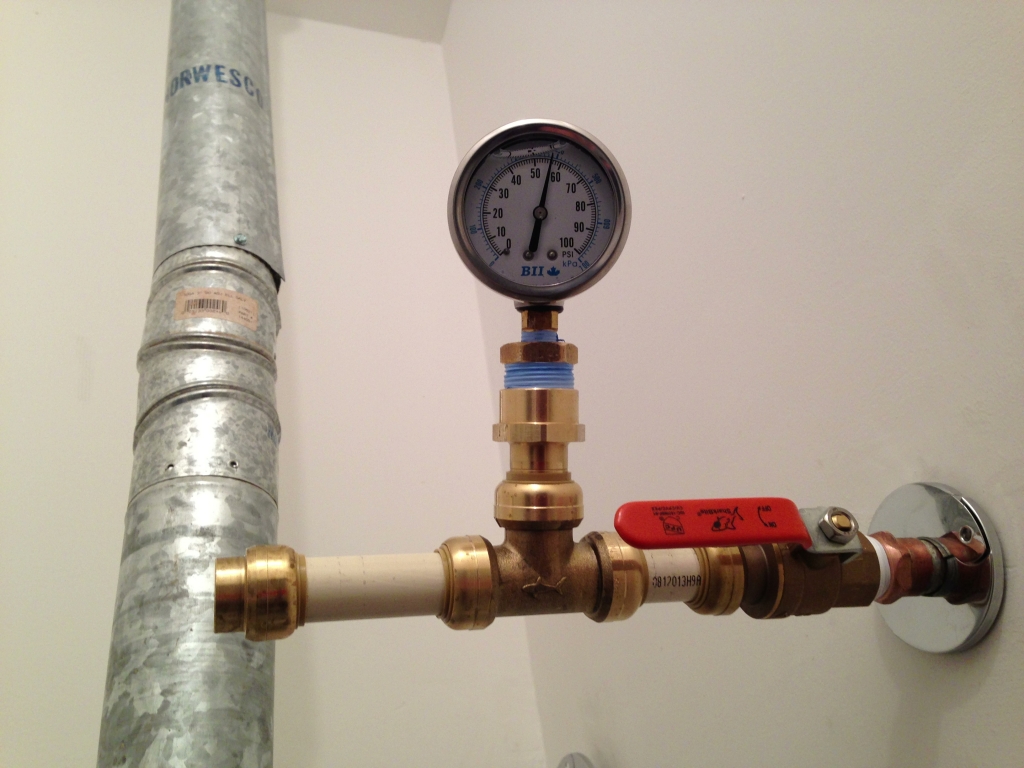
Because our city’s water pressure is a wimpy 40 PSI, we use a pressure boosting tank here at the house which keeps the water pressure between 50-65 PSI (the pump turns on when water use in the house drops the pressure down to 50 PSI, and turns off again when the boosted pressure reaches 65 PSI). But our pressure tank is down in the basement on the south side of the house, and this water heater’s location is on the main floor on the north end, so I needed to know the exact water pressure at the expansion tank’s location. Using CPVC and Shark Bite fittings, finding the pressure was easy. I made sure the pressure tank was boosted to its max of 65 PSI, then clicked together some Shark Bite fittings, CPVC, and a pressure gauge to quickly get an accurate reading:
![Building "temporary plumbing" is easy with Shark Bite]()
Building “temporary plumbing” is easy with Shark Bite
My glycerin-filled gauge showed that 57 PSI should be the max I’ll see at this location, so I took my new expansion tank out to the garage and pumped it up to 57 PSI. After that, connecting everything up was like playing with Tinker Toys. I turned off the shut-off valve again, used the Shark Bite disassembly clip to take apart the pieces I’d put together, then used my Rigid Plastic Pipe Cutter to cut all the small pieces of CPVC that I’d need, click everything into place, screw in the expansion tank, and attach brand new stainless steel hot and cold hook-up hoses to the tank.
![Everything clicked right into place]()
Everything clicked right into place
That round black plastic gadget to the left of my pressure gauge is a Watts Vacuum Relief Valve. My old tank didn’t have one installed, but after reading about how they can save your tank from crushing in on itself if a vacuum occurs on your water line, I decided it was cheap insurance. In some locations, they are actually required by code, so I recommend you spend the extra $30 to install it.
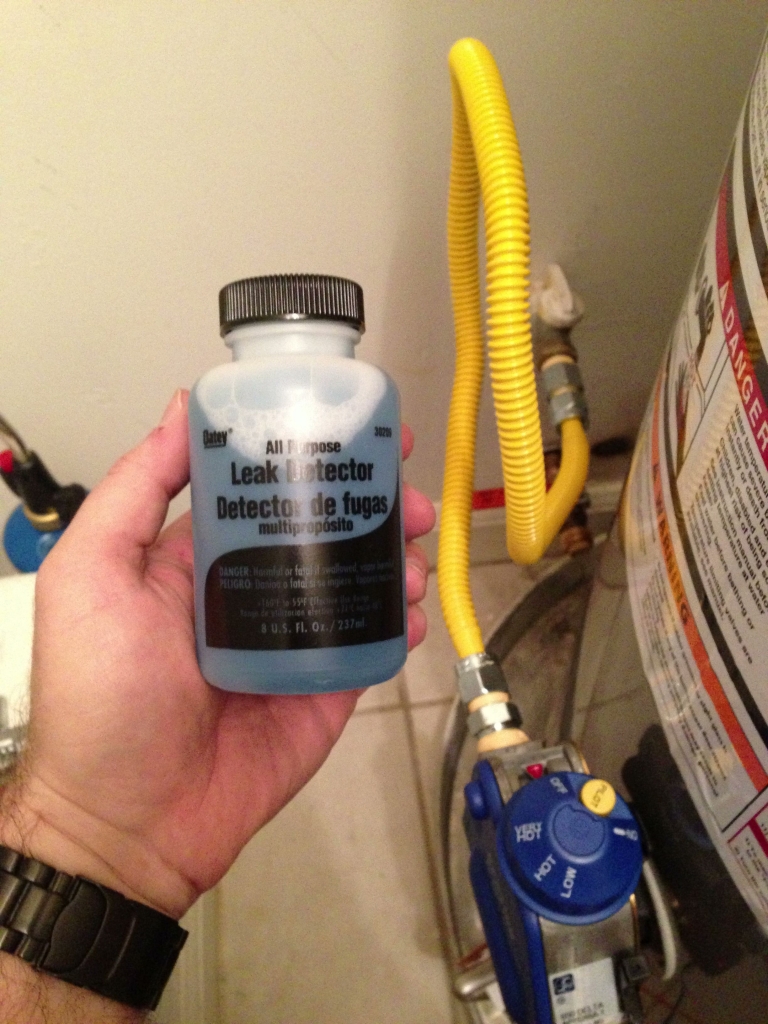
With the water connections up top completed, it was time to turn my attention downward. I put a 1/2″ Shark Bite ball valve on the exposed copper recirculating return line near the floor (the one where I toasted the wall), and also installed a new gas hookup hose on the gas line just above it. I used yellow gas pipe Teflon tape (different than the stuff rated just for water or air use) to make sure all the fittings were sealed tight, then connected the hose to the water heater’s gas inlet. Before turning on the gas valve at the wall, I covered all the joints with some Oatey Leak Detector, which creates highly visible bubbles if there’s a gas leak. You can also diluted dish detergent (which was always good enough for Dad), but I had some of this stuff handy anyway, so I used it.
![Gas line installed... and leak free!]()
Gas line installed… and leak free!
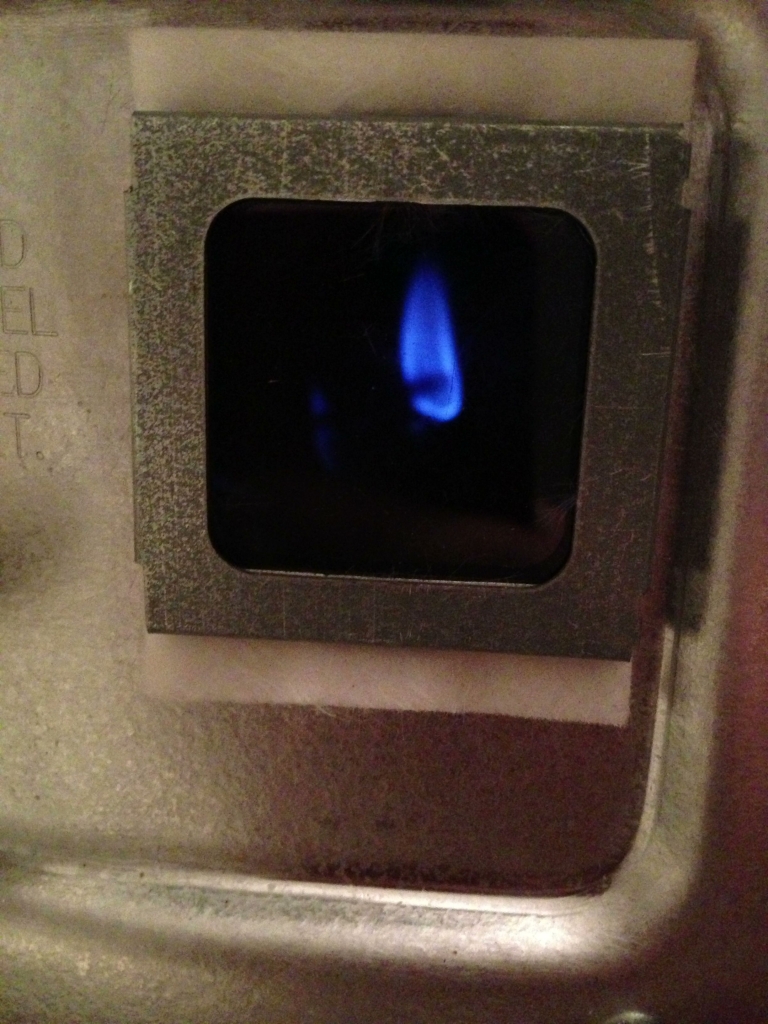
I turned on the gas valve, and was thrilled to see no gas leaks. There was no water in the tank yet, but I wanted to make sure the pilot would light properly before I continued, so I turned the water heater’s gas valve to PILOT and pressed the ignite button (which was cool, since my old water heater had to be lit with a match). After a few attempts, a small blue pilot flame sprang to life behind the viewport:
![We have pilot light!]()
We have pilot light!
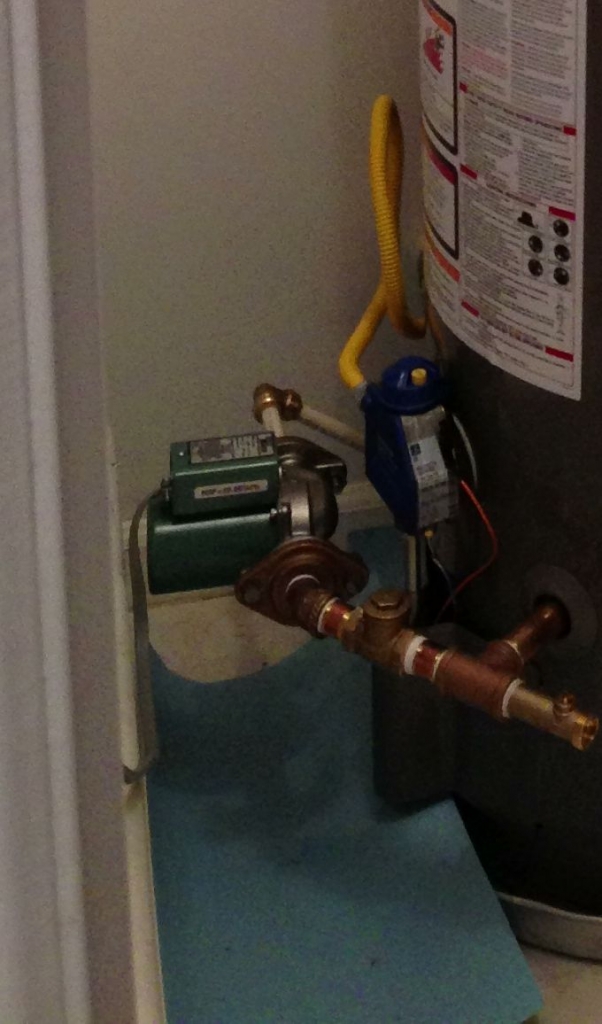
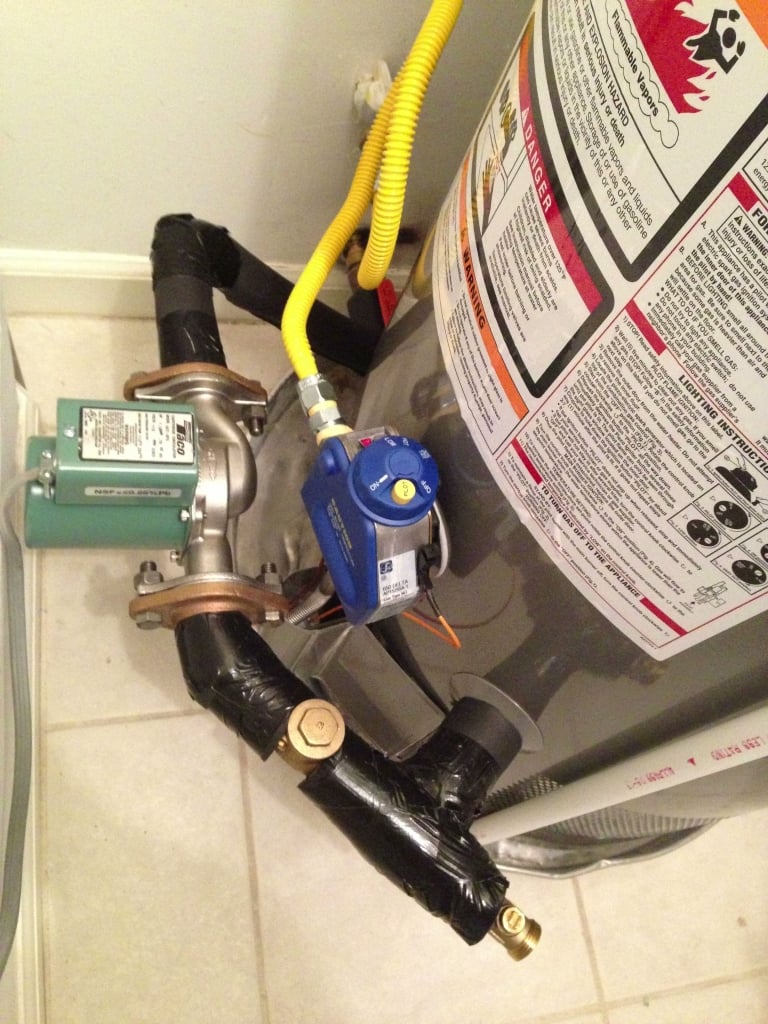
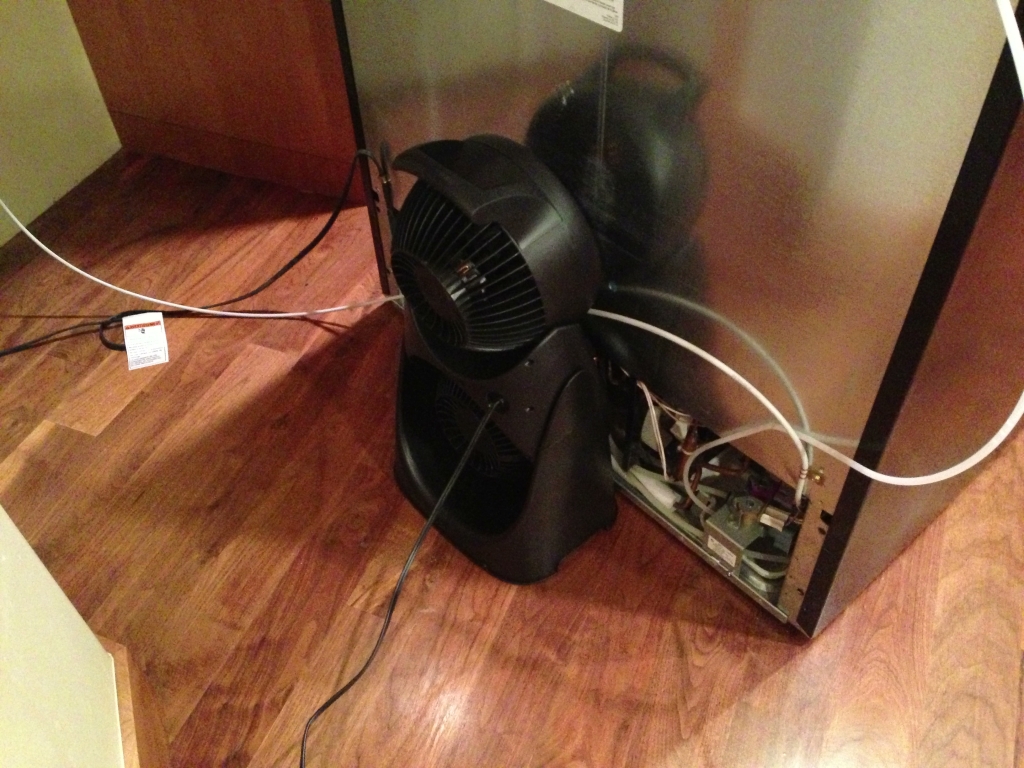
I turned my attention next to rebuilding the recirculating pump return line. I started by placing a bronze tee on the 4″ threaded nipple I’d attached to the tank’s drain hole, connected the original ball valve drain on the right side, then worked my way back toward the recirculating pump’s flange connections using the bronze fittings I’d cleaned, as well as some new brass threaded nipples and a new bronze check valve.
I re-installed the recirculating pump and connected the flange on the other side. At this point, it was now easy to custom cut the correct length of 1/2″ CPVC pipes and use a couple Shark Bite 1/2″ elbows to finish the job.
![Recirculating and drain line installed]()
Recirculating and drain line installed
I realized at this point that the anode rod in my old water heater was only about a year old, since I’d replaced it when I made my very first plumbing post in 2012. So in a massive fit of frugality, I decided to remove the brand new anode from this tank, add it to my collection of spares, and re-use my 1 year old rod from the old tank. Removing the old anode from the tank I’d taken outside to the driveway was easy, since I’d put fresh Teflon tape on it the last time I’d inspected it, and didn’t over-tighten it.
Removing the anode in the new tank that had been installed by the factory, however, was another story altogether. They had torqued that thing down big time. It took everything I had to break that thing free with a two-foot long long socket wrench. Hmmm… it’s almost as if the manufacturer doesn’t want homeowners to be able to remove them, so the tanks will wear out faster and you’ll have to buy a new tank sooner…
Anyway, once I got the anode out, I noticed that the factory had used only a minimal amount of Teflon pipe dope on the threads:
![Factory installed anode rod]()
Factory installed anode rod
I cleaned it up, put it in my spares pile, then put fresh Teflon tape on the 1 year old anode from the old tank, before popping it in the new tank:
![Slightly used anode ready for its new home]()
Slightly used anode ready for its new home
With the old anode in place and all the connections complete, I decided it was to time turn on the water and let the tank fill. I held my breath… and opened the newly installed Shark Bite ball valve up top. I heard cold water gushing into the tank, and kept a keep eye open for any leaks. To my surprise, there were none! I also opened the recirculating line valve near the floor, but waited to turn on the recirculating pump until the tank was full.
As the tank filled, I turned my attention to the discharge tube for the TPR valve on the front of the water heater. Because the floor pan has a built-in drain, I decided to make it easy on myself and have the TPR valve discharge straight down into the pan. I’d purchased a Watts 100DT drain tube for $4 at Home Depot, which is the cheapest way to go. I measured and cut off a small amount from the bottom of the pipe so that it would reach past the lip of the floor pan, then hand-tightened it into the TPR valve.
Once everything was in place, I added a real earthquake strap, and used a socket set to drive the long lag bolts deep into the wall studs. This tank is going nowhere!
When the tank finished filling, I turned the gas valve’s thermostat to HOT, and heard the satisfying “whoomf” of the burner firing. I was making hot water!
![My first water heater install - and I didn't ruin anything!]()
My first water heater install – and I didn’t ruin anything!
Finishing Touches
As the water in the tank heated, I cleaned up my work area, verified the timer settings for my recirculating pump, then measured and cut some rubber pipe insulation tubes for all the hot water pipes. I used black duct tape to seal the joints and ends of the insulation tubes.
![Insulation tubes around the hot water outlet hose and the TPR valve]()
Insulation tubes around the hot water outlet hose and the TPR valve
![Insulation tubing around the recirculating pump return line and drain]()
Insulation tubing around the recirculating pump return line and drain
And that’s how I installed my very first water heater!
Final Thoughts and Lessons Learned
My final thoughts are that I’m extremely glad I decided to tackle this project myself. It seemed major at the outset, but after completing it, I realized it’s like anything else: if you have the right tools and supplies, work without rushing, and think ahead, there’s nothing “magic” about installing a water heater. Anyone can do it.
I also learned the CPVC and Shark Bite fittings are the novice plumber’s friend. I know plenty of pros who also use them, but for those of us who will probably only install 2 or 3 water heaters in our lifetime, they are no-brainers.
I also re-confirmed that while you may get the best prices from big box stores or e-commerce websites, there’s simply no substitute for an old-skool hardware store with an expert behind the counter who will steer you in the right direction.
So go check your water heater. The manufacture date will probably be on the sticker on the side of the unit. If it’s over 12 years old, you might want to start looking for signs of wear. If it’s much older than that, you may want to consider being proactive and swapping it out now. And feel confident that if a computer geek like me can swap his out in a single afternoon, you can, too!
I welcome your questions, comments, and feedback below!
UPDATE: I replaced my 75 gallon unit yesterday (1/22/14). Here are some before pics and the “after” shot!
![Cold inlet and hot outlet on old 75 gallon water heater]()
Cold inlet and hot outlet on old 75 gallon water heater
![Corrosion from leaky hot water outlet]()
Corrosion from leaky hot water outlet
![Corrosion on cold water side, too]()
Corrosion on cold water side, too
![Old 75 gallon water heater removed]()
Old 75 gallon water heater removed
![New 75 gallon water heater (with new expansion tank) installed!]()
New 75 gallon water heater (with new expansion tank) installed!


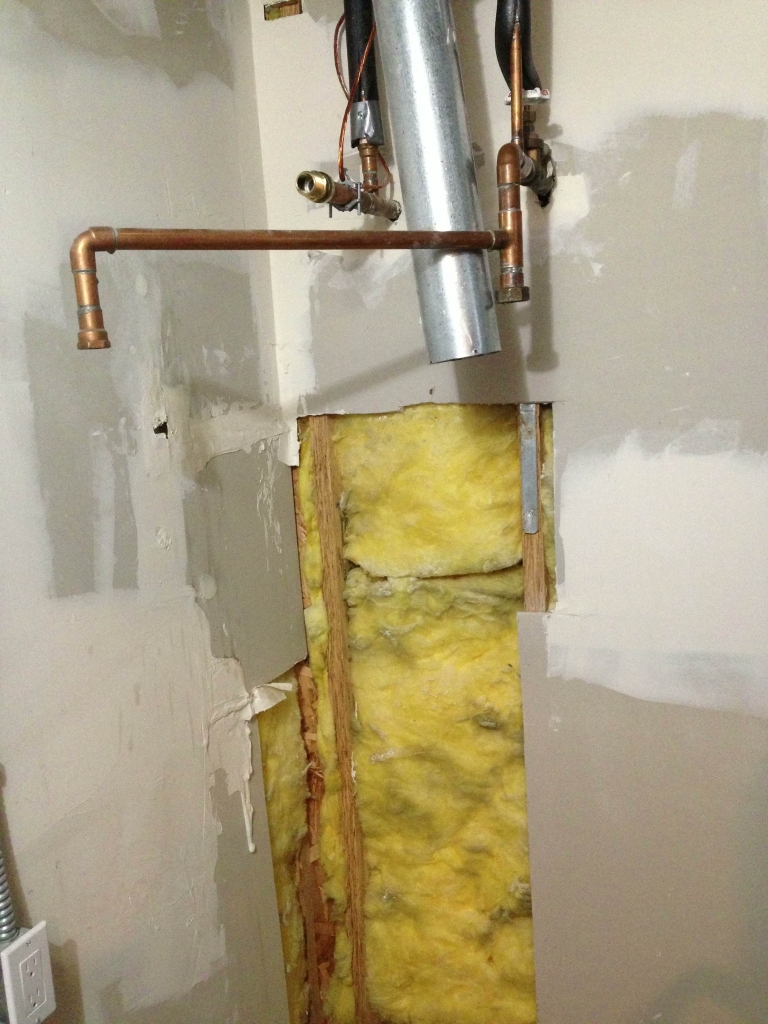


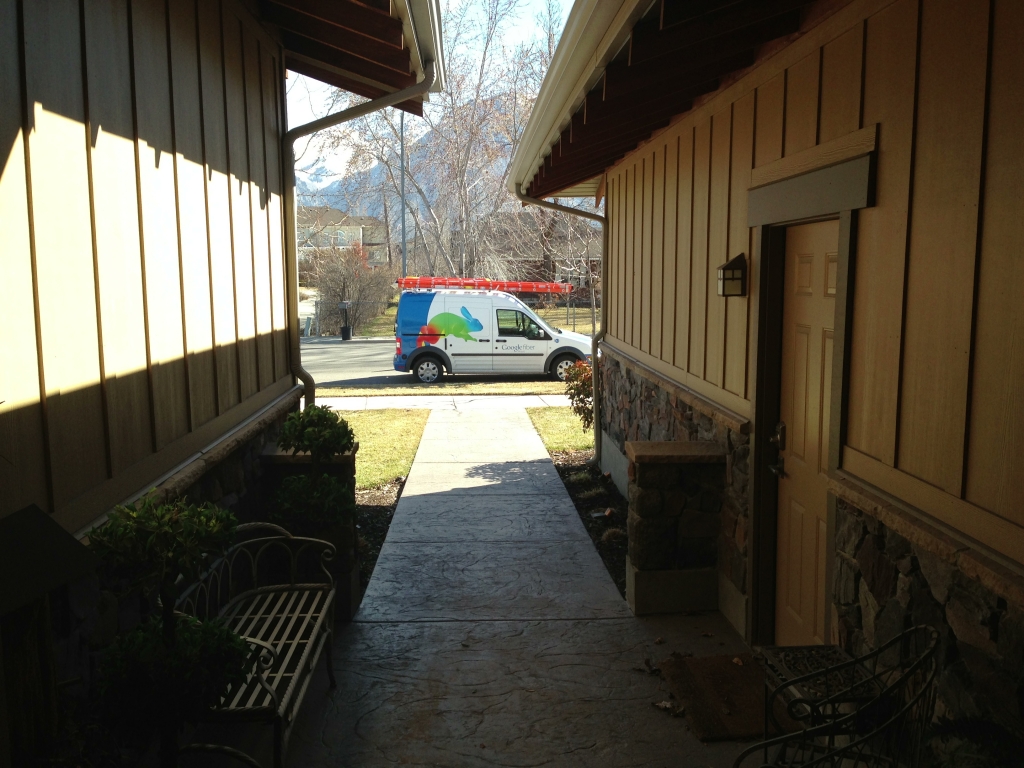
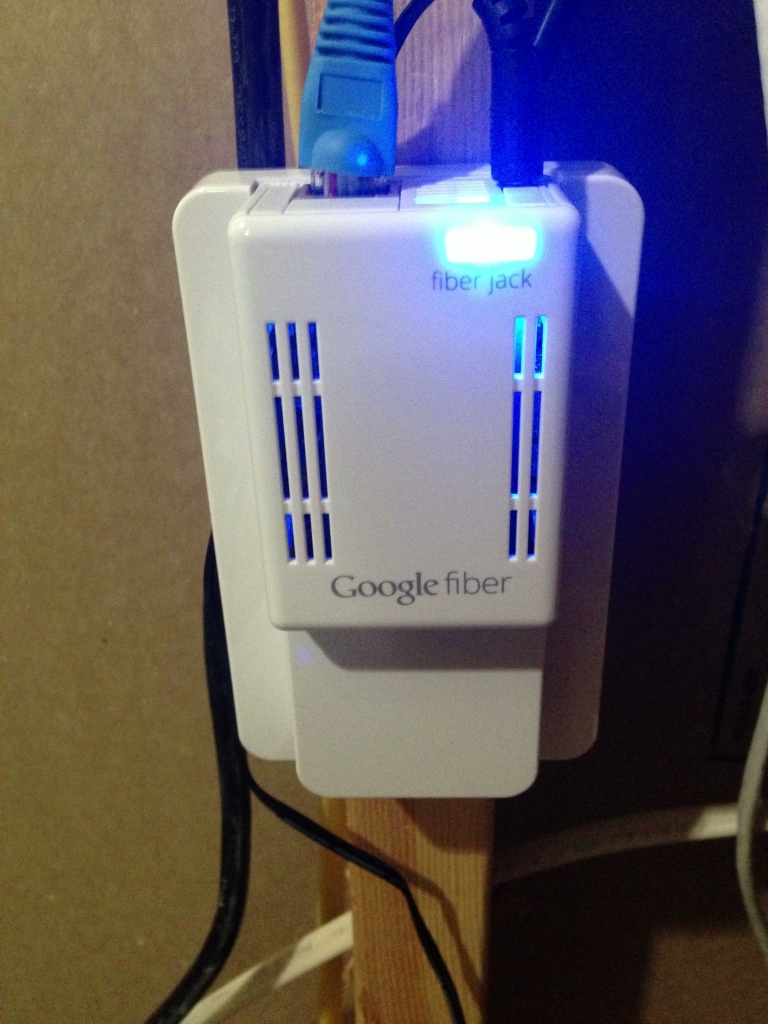
 This post is a follow-up to
  Fair is fair. When a company gets it wrong, I blog about it. When a company gets it right, I also blog about it. This week, a couple of companies got it right.
 Among hard-core geeks, the speed of your Internet connection is a source of pride. Back in 1996 when I moved to the Seattle area, I paid a couple thousand dollars a month for a frame-relay full T1 connection to my house, giving me a 1.4 Megabits per second (Mbps) connection. The only other alternative at the time was dial-up or ISDN (which is still basically dial-up, just faster), and since I was running my business from home, I needed a fast connection.


 If you’re a DirecTV customer, and you want to watch your local channels and get shows from the “big” networks like ABC, CBS, NBC, and Fox, then there’s a good chance you’re coughing up extra money for their local channels.
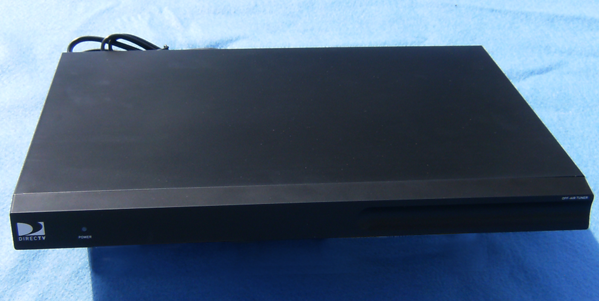

 Then 112V:


 Glock’s marketing tagline is “Perfection,” but that doesn’t prevent many of us from wanting a little something extra from these popular striker-fired pistols. This article will include links to my YouTube video series on